Last Updated on April 21, 2023 by ellen
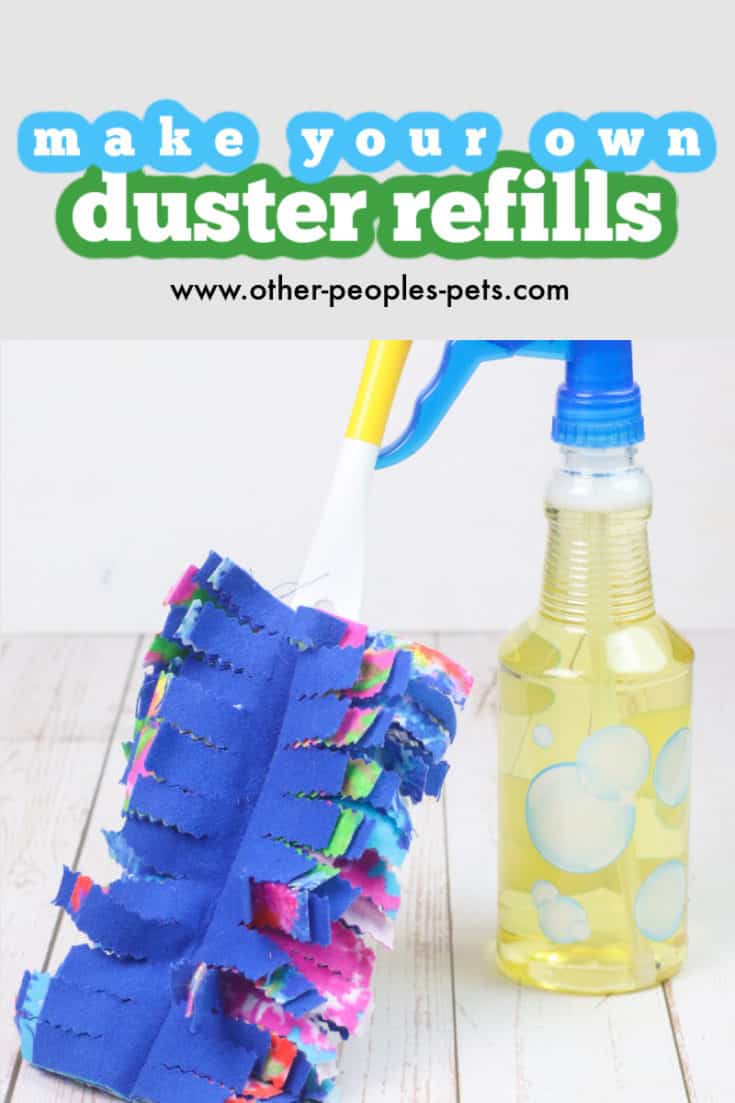
Use this duster sewing pattern to make a DIY Swiffer to remove pet hair from floors and surfaces. This homemade Swiffer refill is one of the best pet hair removers I’ve tried!
Posts may be sponsored. This post contains affiliate links, which means I will make a commission at no extra cost to you should you click through and make a purchase. As an Amazon Associate I earn from qualifying purchases.
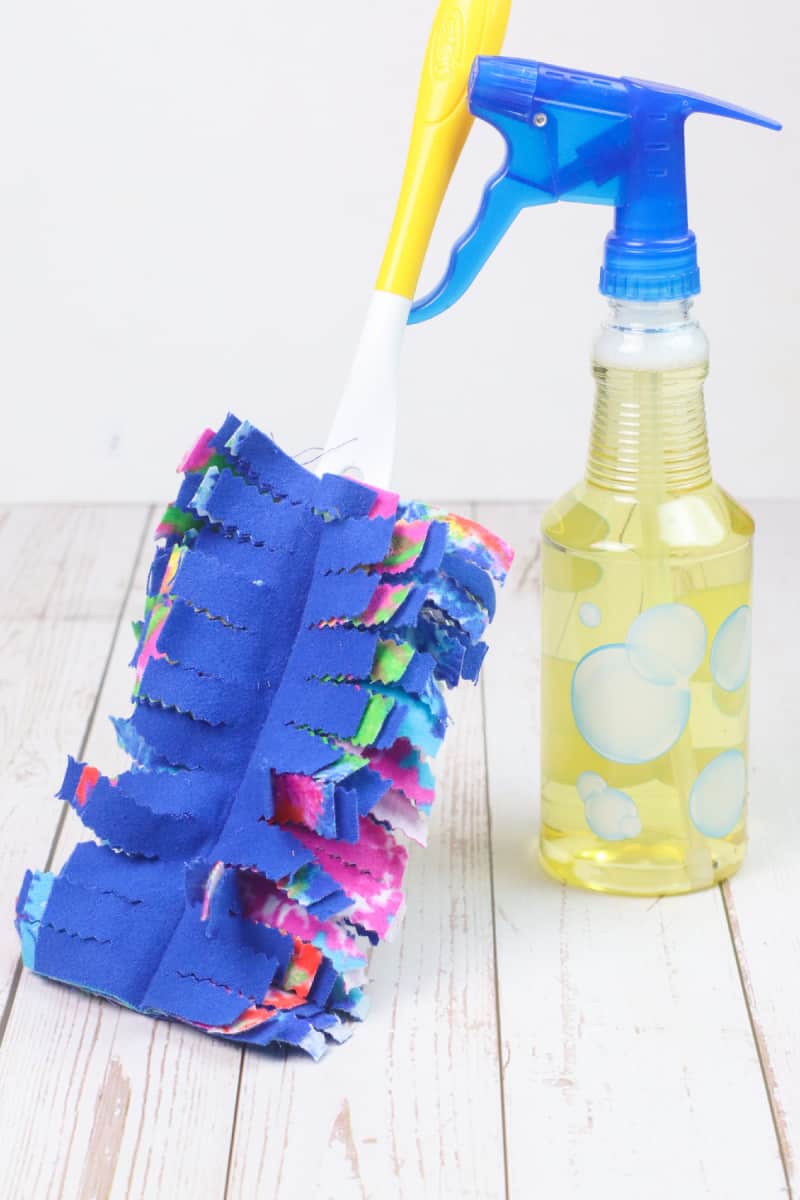
Table of Contents
Duster Sewing Pattern
So, if you’re looking for a pet hair remover, you’ve probably fallen in love with the Swiffer style duster. But, you may not want to buy refills every week to continue to remove pet hair from your home.
Removing pet hair is easy with this easy DIY cleaning hack.
Best duster for pet hair
The best duster for pet hair is the Swiffer. You can buy the refills here if you want to. But, making your own duster is simple and costs much less money.
No products found.
What is the most effective pet hair remover?
The best pet hair remover is the Swiffer-style duster. The disposable pads trap and contain pet hair better than any other type of duster.
If you have a pet, you probably find their pet hair on the floor as well as on tables and other surfaces. The problem seems to be even worse in cooler months when the furnace is running.
Dogs and cats shed regularly. And, their hair sticks to all the different surfaces in my home.
Pet hair can be a horrible problem for allergy sufferers because it ends up on furniture and clothes.
This homemade Swiffer refill works just as well as the store-bought refills but is much better for your budget.
Since pet hair sticks to everything, you’ll find lots of ways to use this pet hair remover. I love to use it in tight corners where the vacuum might not reach during my normal cleaning routine.
What surfaces does this work on?
You can use this on any hard surfaces in your home from the floor to tables and fan blades. If you see pet fur stuck to it, give it a try.
It really does pick up all the hair as well as surface dirt. It’s a great tool and easy to make.
Finally, if you want a pet hair remover for pet hairs on knit fabrics or your favorite black shirt, I recommend a lint roller. It works well for cat fur and dog hair.
Check out the best vacuum cleaner for dog hair I’ve tried. It works on several surfaces and does a much better job than a traditional broom.
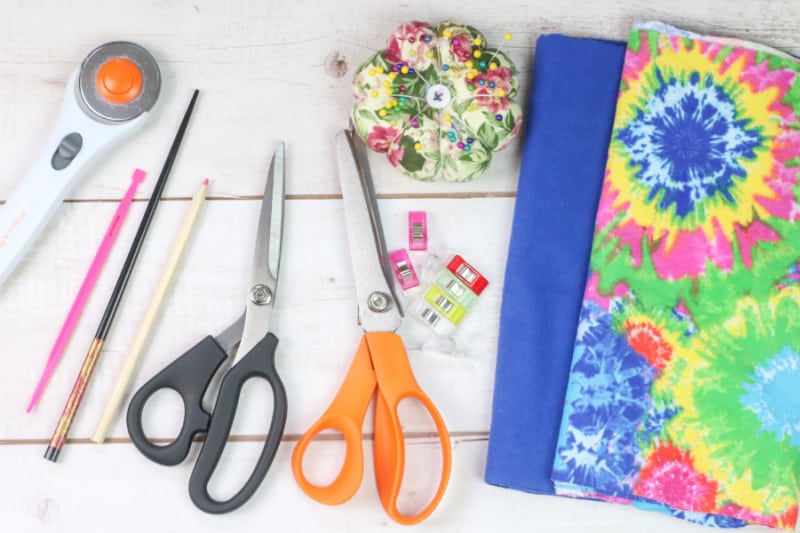
Washable duster supplies
- ¼ yard of flannel fabric
- Sewing Machine
- Matching thread
- Fabric marking pen
- Sewing pins or clips
- Standard sewing scissors
- Pinking shears
- Cutting mat and ruler, measuring tape or ruler
Skill Level: Beginner
Approximate time to complete: 20-30 minutes
Approximate cost to make: $2.79 (As costs vary from store to store, this is based on my local Joann fabric price of $7.99 with a 30% sale which they have quite often on flannel)
How to make your own Swiffer duster
So, skip the duster sewing pattern and follow these directions.
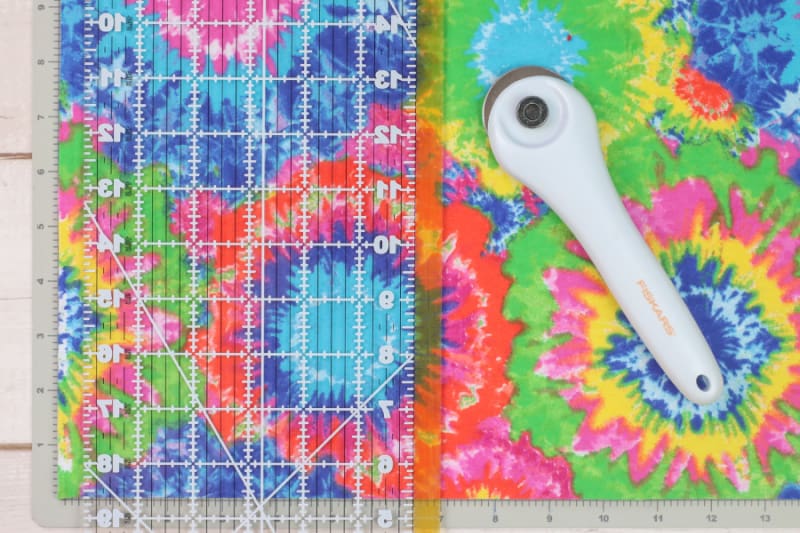
Cut the following pieces from your fabric (2) 5” x 7”, (2) 4 ½” x 7”, (2) 4” x 7” and (2) 3 ½” x 7”
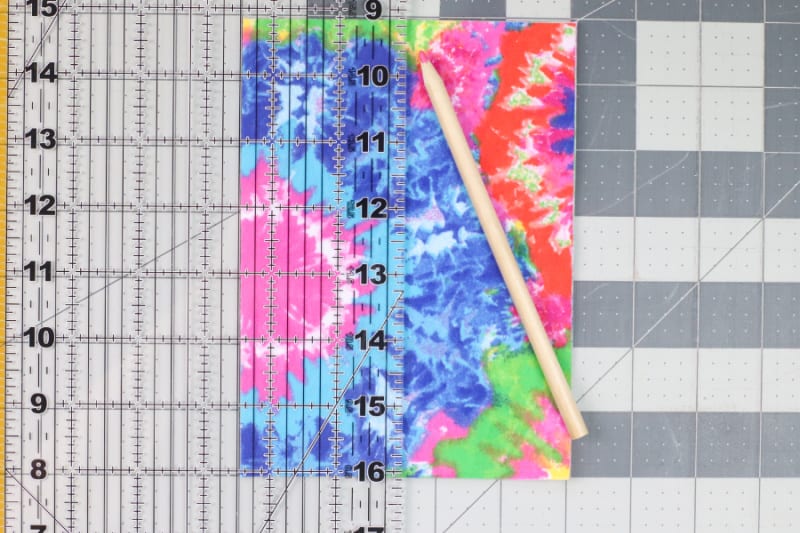
With the wrong sides facing, place the two 5” x 7” pieces together. Using a fabric marker and ruler, draw a line down the center. Next, draw a line that is ¾” on either side of the center line.
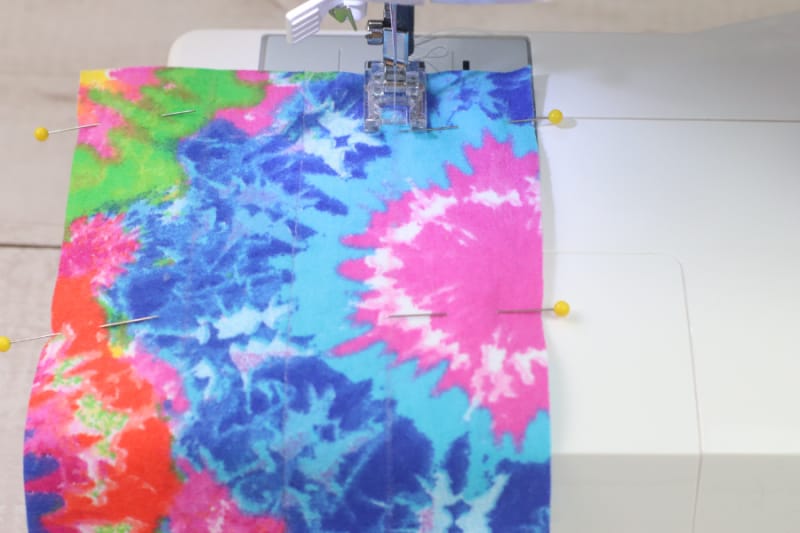
Pin in place and sew a straight stitch down each marked line. This will form the pockets your handle will slide into.
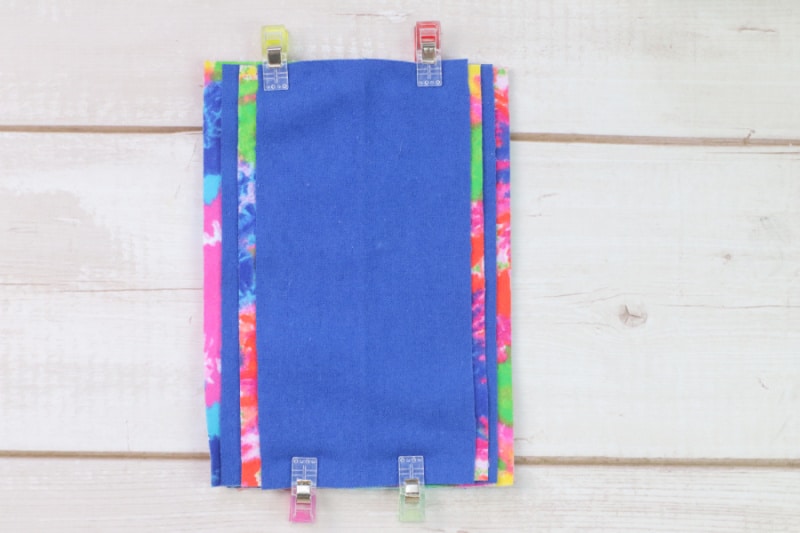
Place your 5” x 7” piece on your work surface and center one of the 4 ½” x 7” pieces on top. Next, center one of the 4” x 7” inch pieces on top of that. Finally, center one of the 3 ½”x 7” pieces on top of that. Flip and repeat with the remaining pieces, largest to smallest.
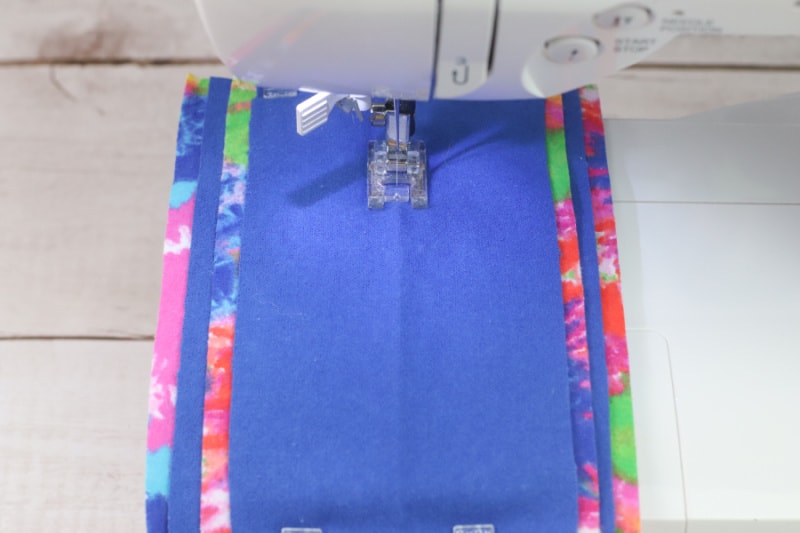
Using your fabric marker, draw a line down the center of your stack. Pin in place and sew a straight stitch through all the layers on the marked line.
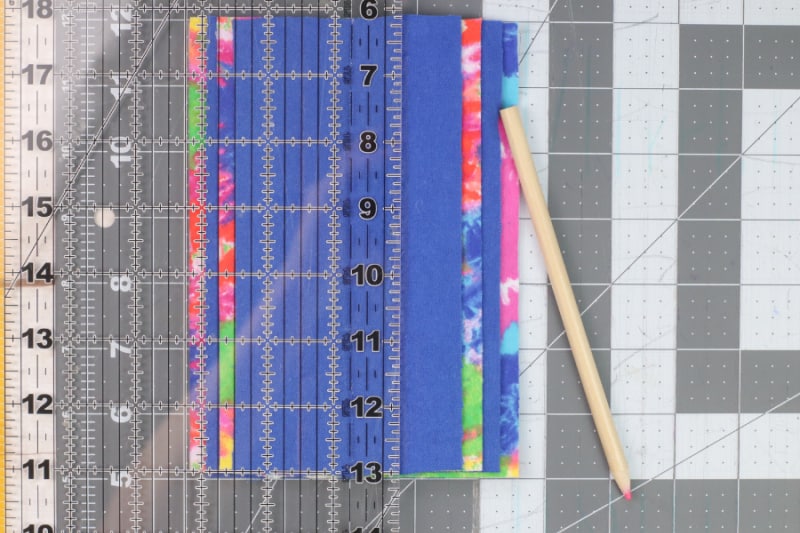
Using your fabric marker, draw a line that is ¾” on either side of the center stitch you just made. This is your guide that you don’t want to cut into on step 11.
This step is optional, but I found it helpful. Using your fabric marker, mark at ½” increments across each side.
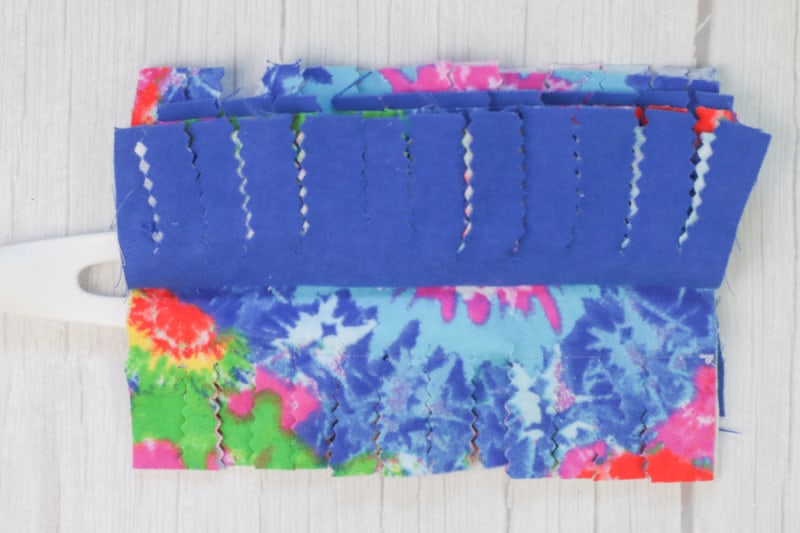
You can feel there are two layers. Lift the “top” layer and you will see where you stitched your 3 lines in Step 4. Using your pinking shears, cut ½” slits on each side, just shy of the stitched lines on either side.
Do the same thing with the rest of the layers, being careful not to cut through the center line you stitched.

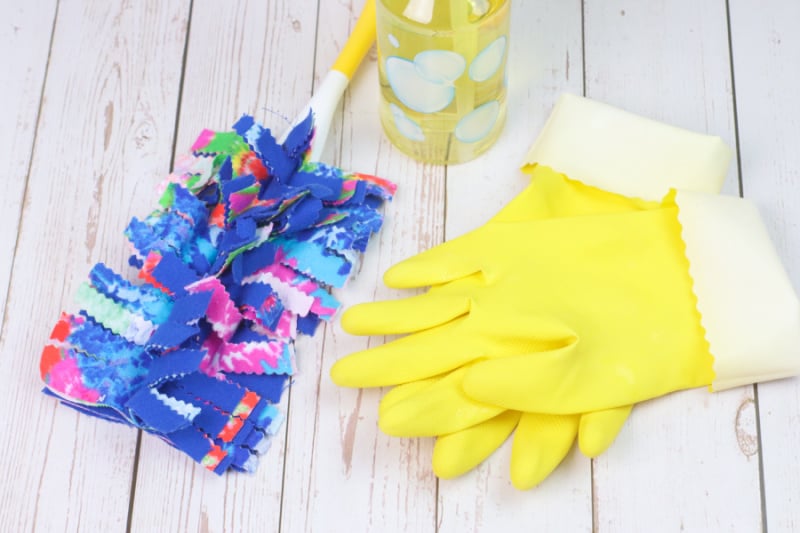
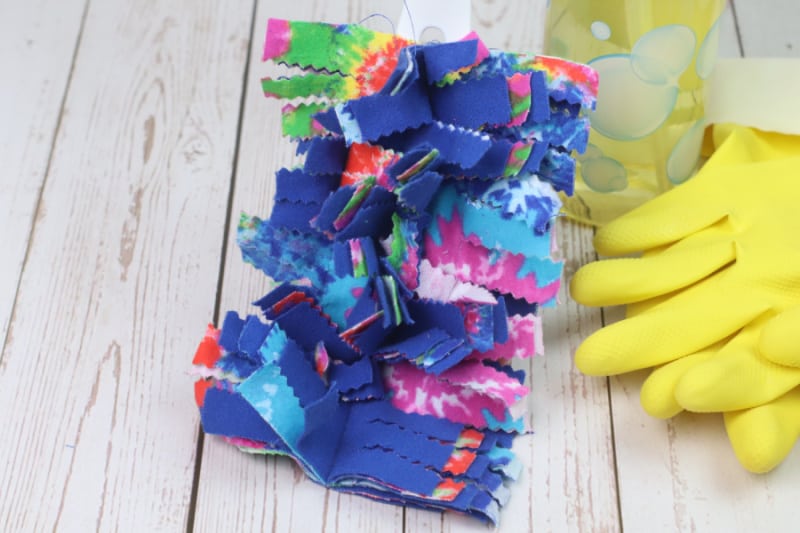
Finally, insert the duster handle into the pockets you’ve created. Fluff the slits that you cut, and you are ready to use your Easy DIY Reusable Duster Cloth! When your cloth gets dirty, you can just toss them in your regular laundry!
Tips
To keep your duster from fraying when you wash it, you will cut on the bias or at a 45-degree angle to the selvage edge. When using a cutting mat, you will already have bias lines marked for you to make this easier to follow!
So, there are no patterns needed for this pet hair remover refill. Just follow the directions above.
You can use this without a handle, too! It works great as a dust cloth.
How to use the pet hair remover
So, it’s simple to use. First, grab the duster with one hand and use the other to gently move it back and forth over whatever surface you want to clean. You’ll be amazed at how much pet hair this removes!
However, you can make multiple passes if you need to. It picks up stray hairs from all over your house. Pet owners will love this frugal alternative for removing hair.

How to launder this pet hair remover
Wash on the gentle cycle in warm water. You can add natural fabric softener if you like.
You can also add dryer sheets when you dry them. But, you only need a few minutes on low.
I usually wash them like I do delicate clothing and they last quite a while.
So, make a batch of these and store them with your towels. Pet owners will be able to remove hair easily without buying another duster from the store.
Related Reading
Finally, if you enjoyed this duster sewing pattern, you may enjoy these.
- How to get dog hair out of car seats
- Do indoor rabbits need bedding
- Cleaning a guinea pig cage
- Dog ear cleaning wipes
- Best bedding for guinea pigs
Pet Hair Duster Sewing Pattern DIY
Use this duster sewing pattern to make a DIY Swiffer to remove pet hair from floors and surfaces. This homemade Swiffer refill is one of the best pet hair removers I've tried!
Materials
- ¼ yard of flannel fabric
- Sewing Machine
- Matching thread
- Fabric marking pen
- Sewing pins or clips
- Standard sewing scissors
- Pinking shears
- Cutting mat and ruler, measuring tape or ruler
Tools
- sewing machine
Instructions
- Cut the following pieces from your fabric (2) 5” x 7”, (2) 4 ½” x 7”, (2) 4” x 7” and (2) 3 ½” x 7”
- With wrong sides facing, place the two 5” x 7” pieces together. Using a fabric marker and ruler, draw a line down the center. Next, draw a line that is ¾” on either side of the center line. Pin in place and sew a straight stitch down each marked line. This will form the pockets your handle will slide into.
- Place your 5” x 7” piece on your work surface and center one of the 4 ½” x 7” pieces on top. Next, center one of the 4” x 7” inch pieces on top of that. Finally, center one of the 3 ½”x 7” pieces on top of that. Flip and repeat with the remaining pieces, largest to smallest.
- Using your fabric marker, draw a line down the center of your stack. Pin in place and sew a straight stitch down through all the layers on the marked line.
- Using your fabric marker, draw a line that is ¾” on either side of the center stitch you just made. This is your guide that you don’t want to cut into on step 11.
- This step is optional, but I found it helpful. Using your fabric marker, mark at ½” increments across each side.
- You can feel there are two layers. Lift the “top” layer and you will see where you stitched your 3 lines in Step 4. Using your pinking shears, cut ½” slits on each side, just shy of the stitched lines on either side.
- Now you are going to do the same thing with the rest of the layers, being careful not to cut through the center line you stitched.
- Insert the duster handle into the pockets you’ve created. Fluff the slits that you cut, and you are ready to use your Easy DIY Reusable Duster Cloth! When your cloth gets dirty, you can just toss in your regular laundry!

Ellen runs a small pet sitting business in southern Vermont. She has experience with a variety of small animals, dogs and cats. She has also cared for ducks, chickens and rabbits. Combined, she has over 20 years of experience in pet care and pet sitting.
Love this! I need to sharpen my pinking shears though. Pinning this and thanks for helping me recycle (my pilly flannel) and save money!
You are very welcome!